Examples
Following are some blueprint examples of the functionalities provided:
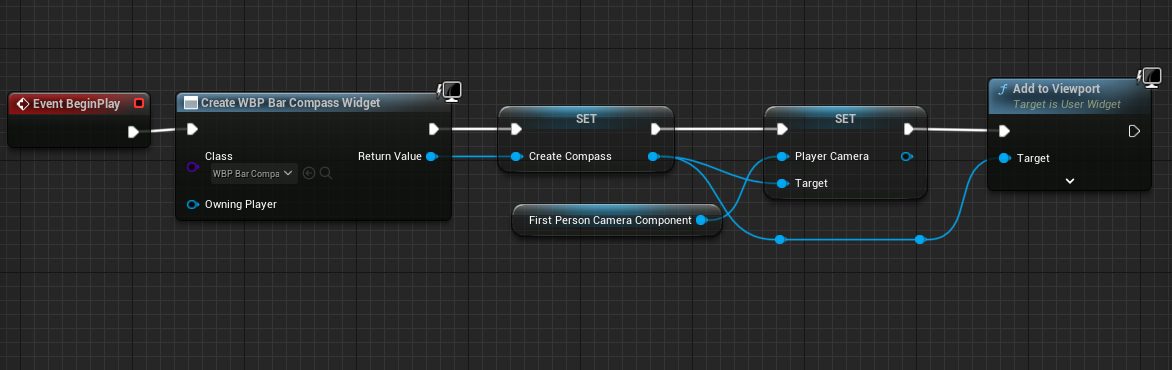
Bar Compass Widget
This widget adds a bar compass with an indicator to the hud of the player. (The images used are sample images found online used only for representation purpose. Please use your own image)
Usage
Following is the blueprint code that uses the widget
Output

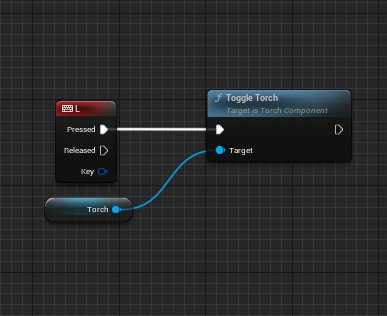
Torch Component
This adds a light source to the character. This works well as a effect only for a first person character.
Usage
Following is the blueprint code that uses the component
Output

Camera Zoom Component
This Component Allows a character to toggle zoom in and zoom out. Add this component from the menu to the character.
Usage
Following is the blueprint code that uses the component

Output

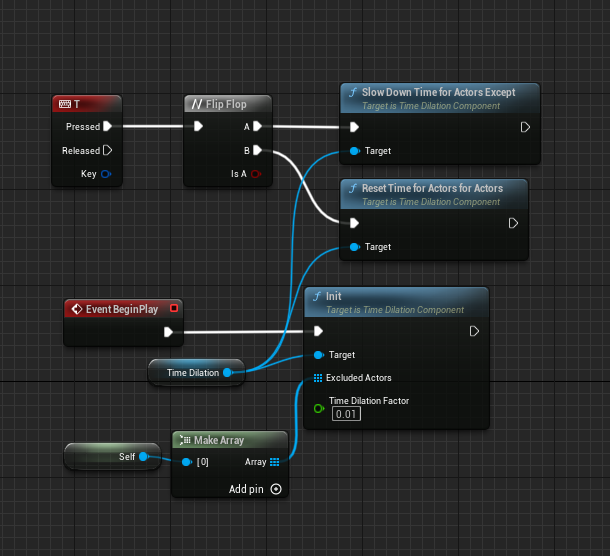
Time Dilation Component
This Component allows users to create a time slow down effect while inversing the effect for the excluded actors giving the perception of time freeze or slow down.
Usage
Following is the blueprint code that uses the component. In this example the player character is allowed to move at normal pace while the other actors in the world are frozen.
Output

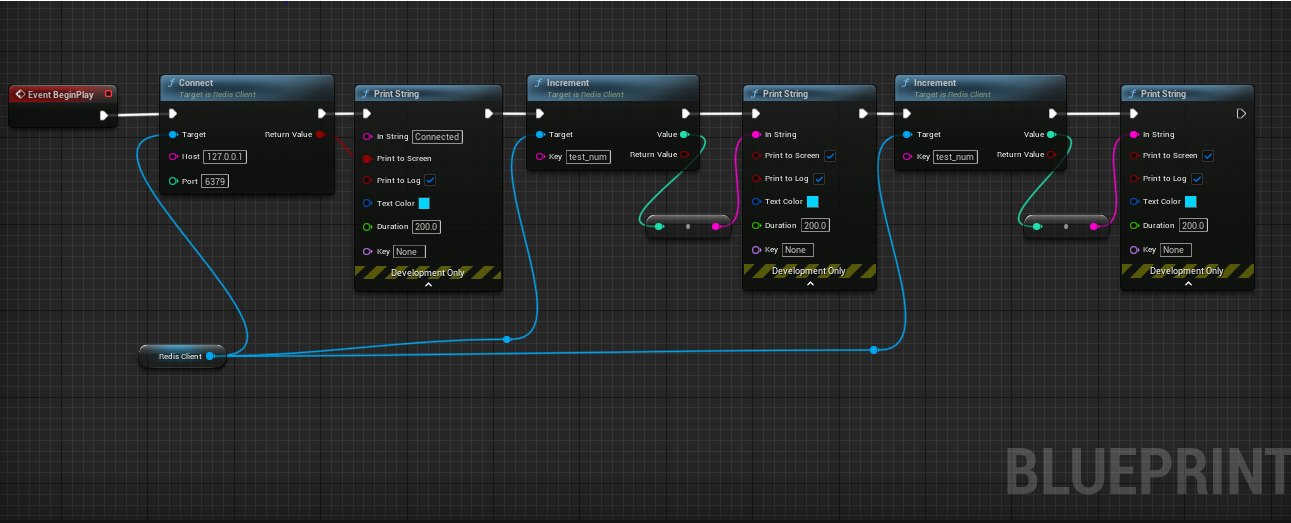
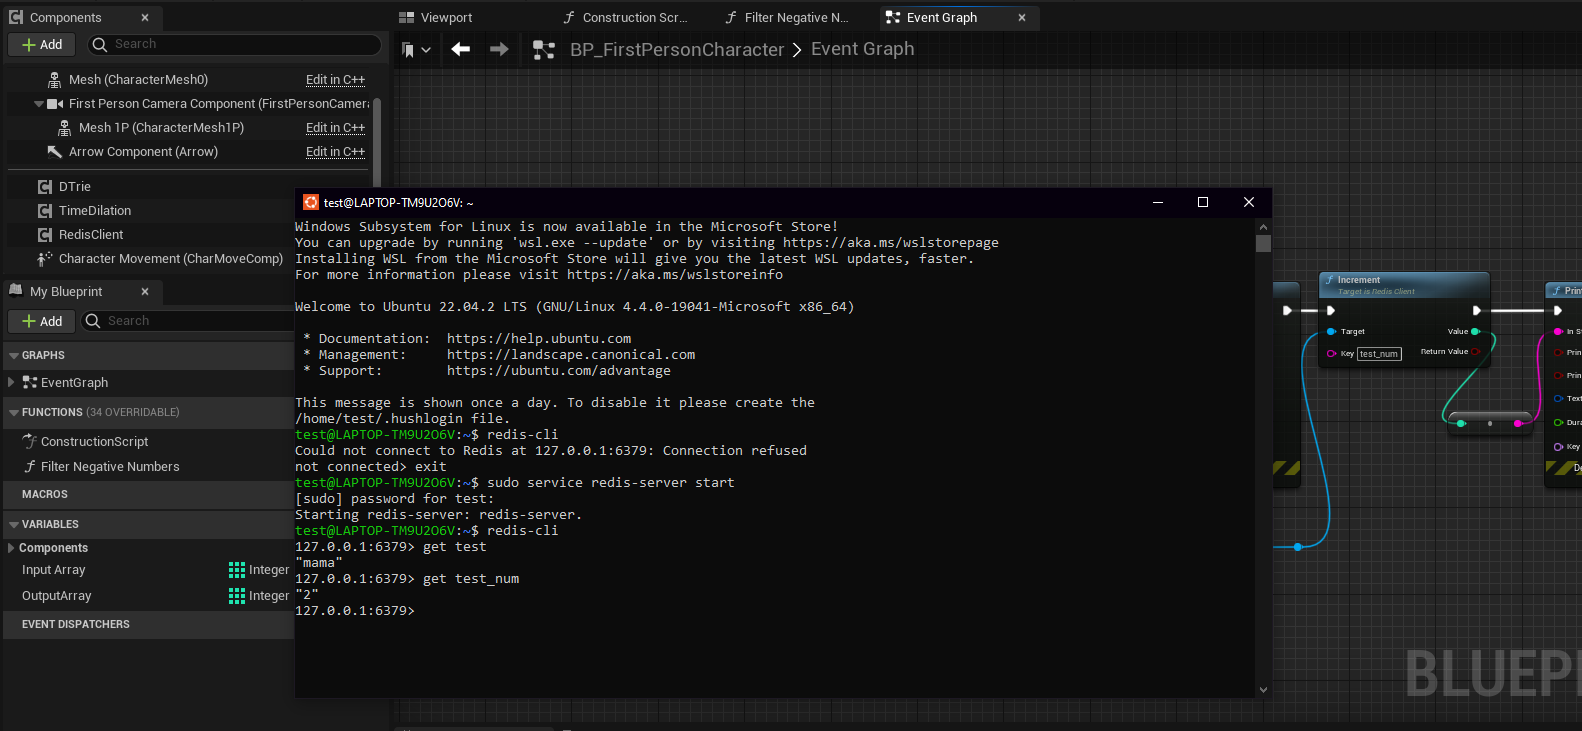
Redis Client
We have exposed the functionality of redis++ library via blueprint.
Usage
Following is a simple code that calls the increment function to increment value of an integer after connecting with redis. For testing purpose I ran a redis instance on “Windows Subsystem for Linux”
Post running the blueprint following was the outcome
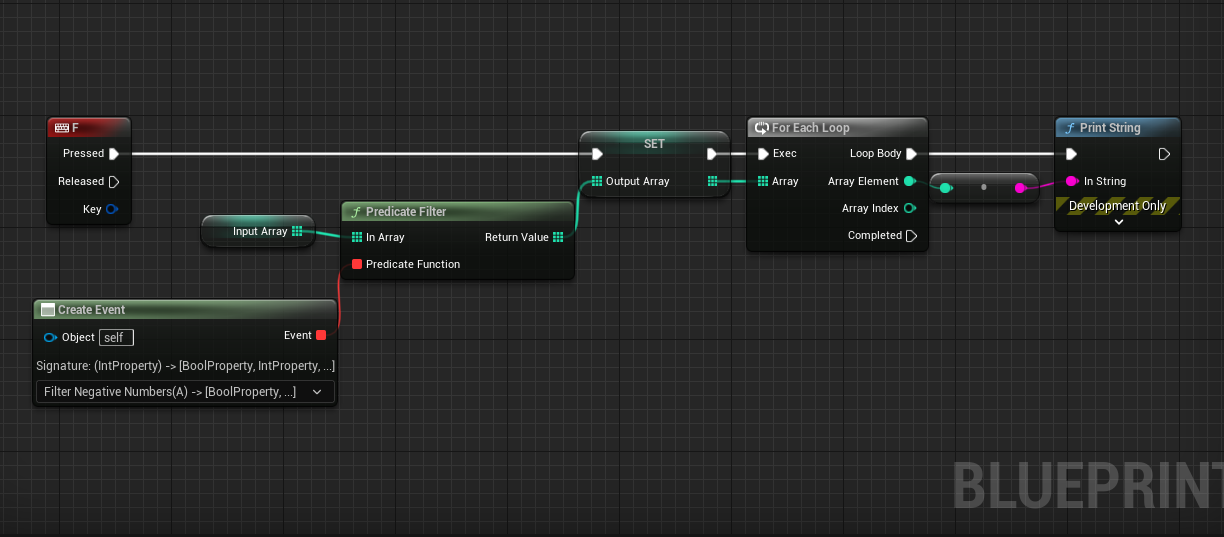
Array Library
Array Library provides various library functions and utilities to extend the funcitonality of the arrays.
Usage
Below shows the example code for the predicate filter (this allows users to create functions to filter data)
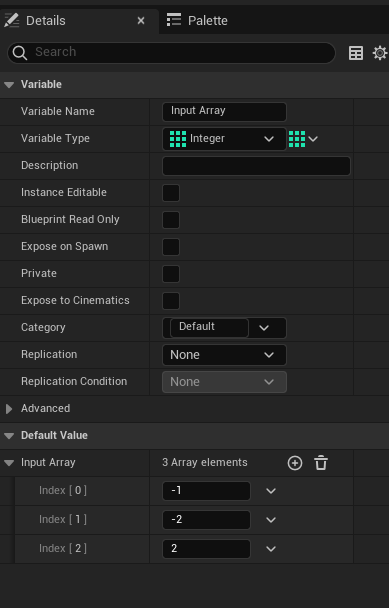
Following is the input array
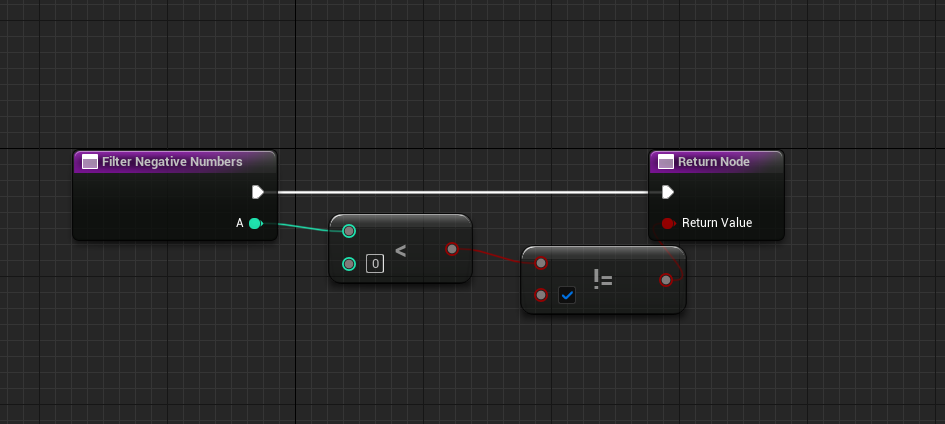
Custom function
Output

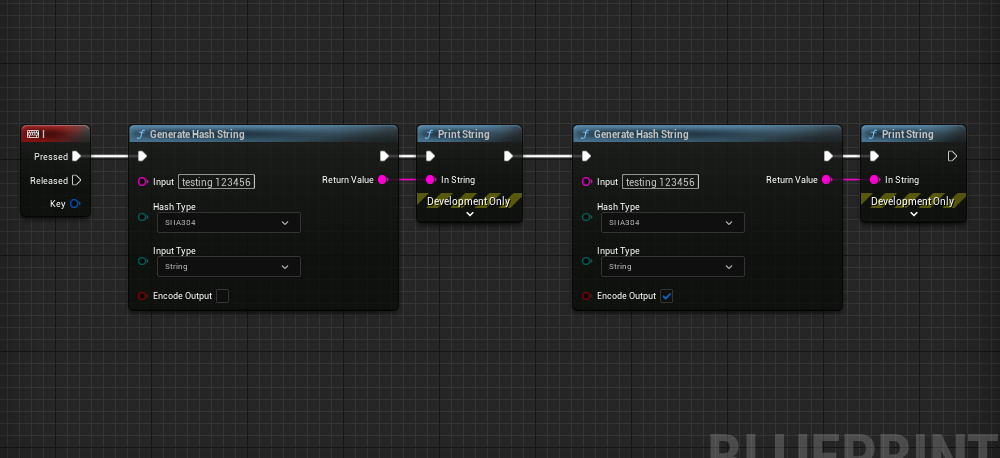
Message Digest Library
Call the generate hash string and choose from a wide variety of encryption provided.
It can take two types of inputs file path or a string. The hash string generated can be base 64 encoded.
Usage
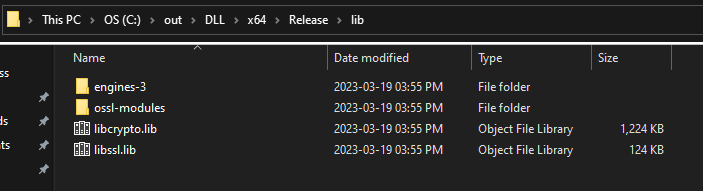
File Utility Library
This library provides multiple blueprint functions that allows you to perform various operations involving manipulation of files and directories. Here is a function that checks whether file exists or not.
Usage
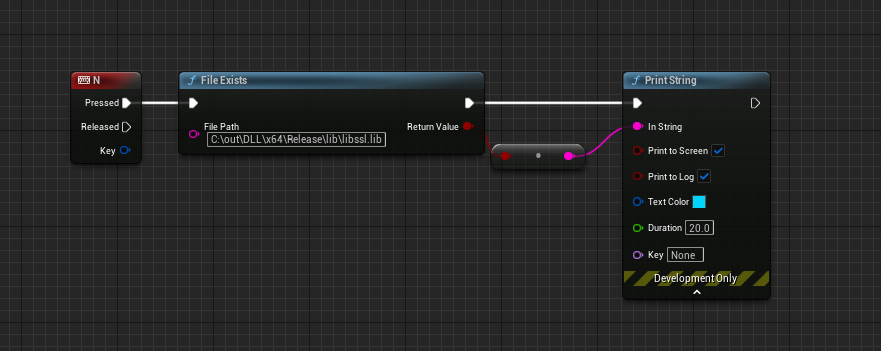
Output
As you can see the file actually exists in the directory.
Data Structures
Currently implementation of 3 Data Structures namely trie, stack and matrix have been provided. These provide a wide range of functionalities for each type.
Below is an example of using a data structure. These are implemented as components and can be imported as follows:-
These names have D prepended for each type.
Usage
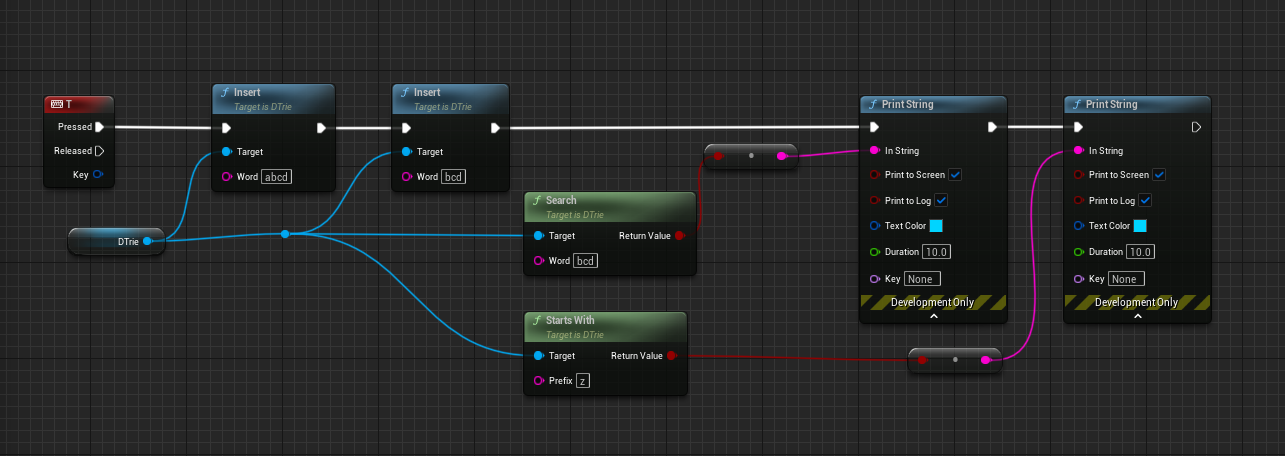
When running the same, we get the following results:
Output
Similarly other data structures can be used.
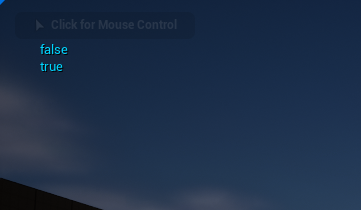
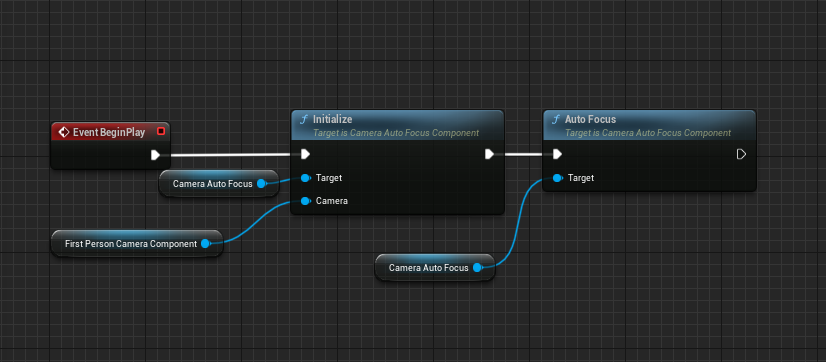
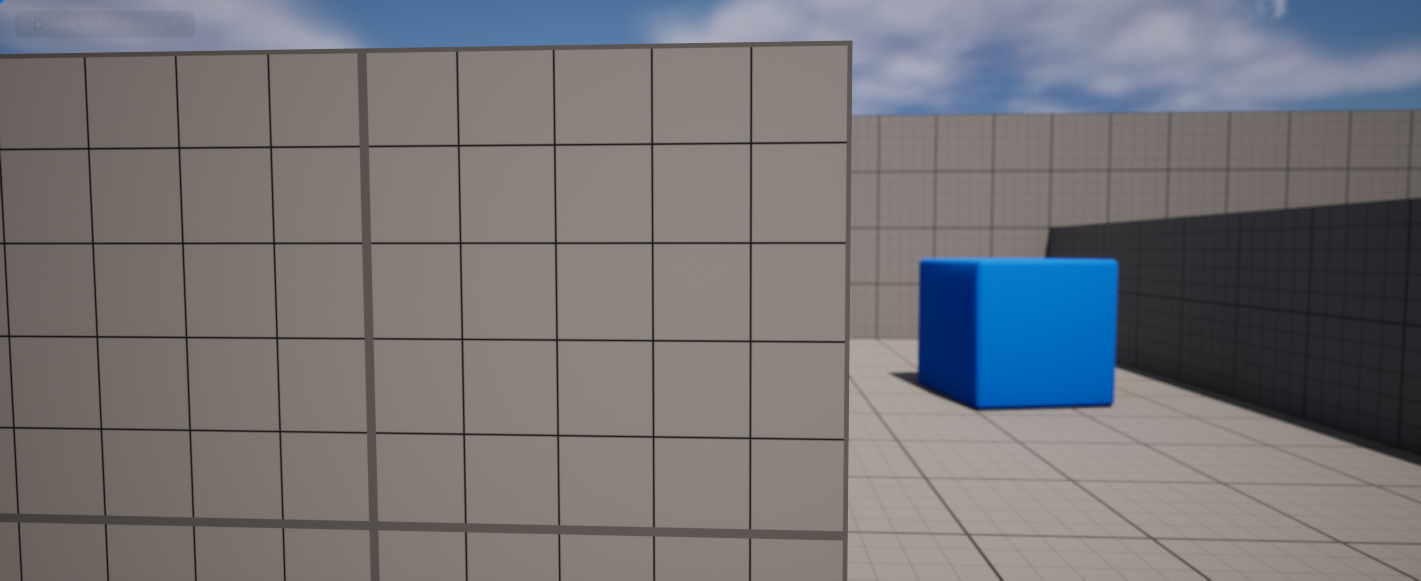
Camera Auto Focus Component
As the component suggests the following helps to auto focus on certain objects and blurs out the back ground.
Usage
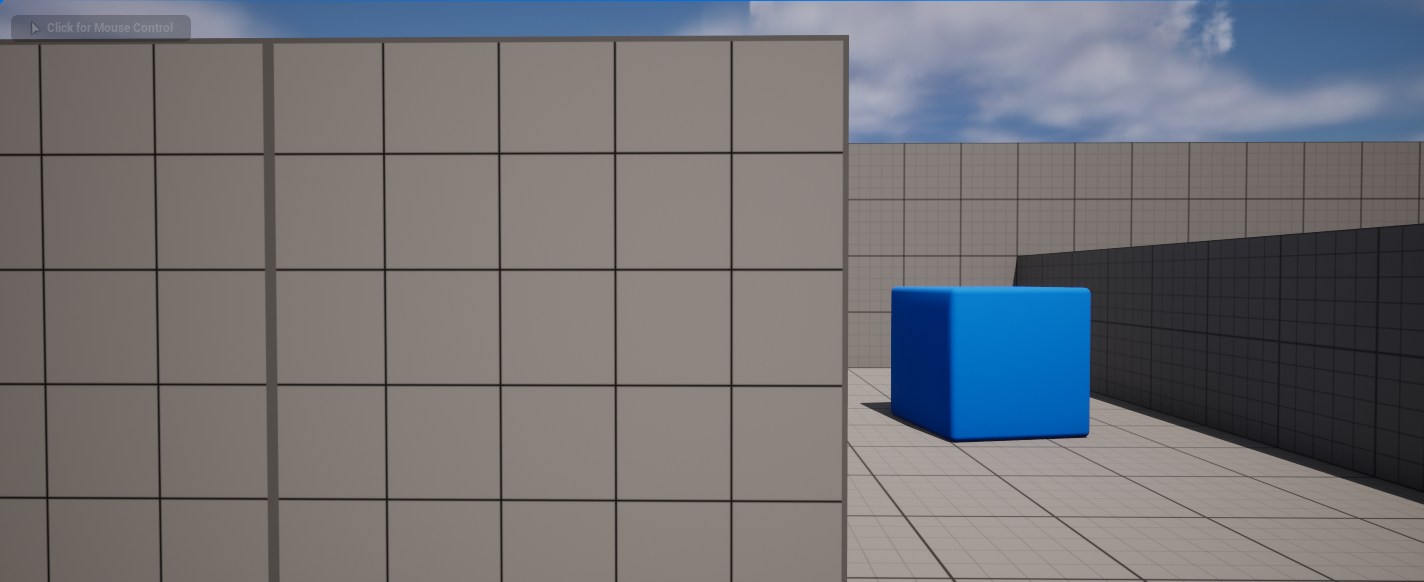
Without Auto Focus
Output
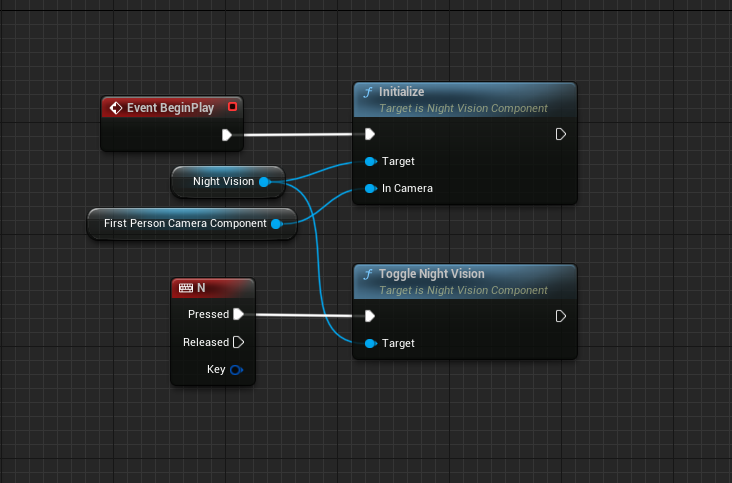
Night Vision
As the name suggests it creates a night vision effect when enabled.
Usage
Add the night vision component to the player character. Then do the following:
Output

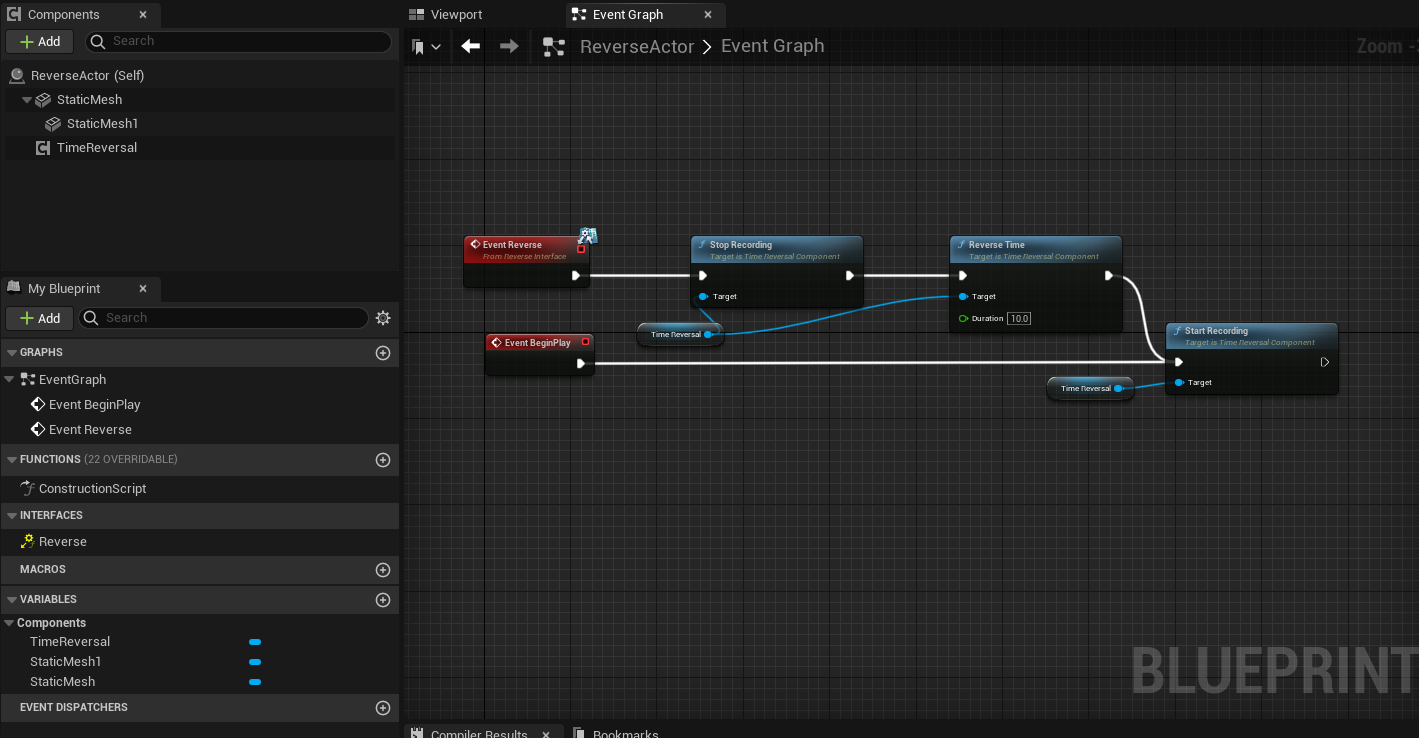
Time Reversal Component
This component allows users to trace back path for actors consisting of static meshes (current works only for static meshes)
Usage
Here is the general setup done for demonstration purpose.
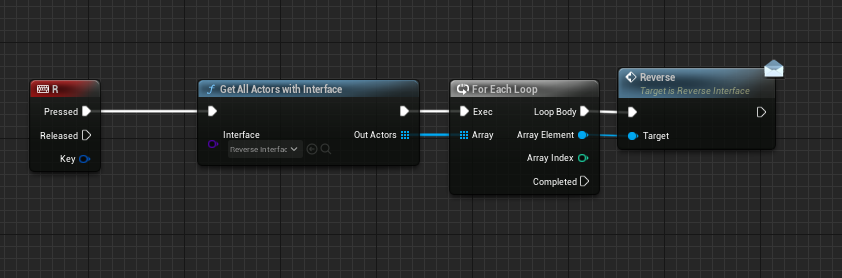
Create an interace as shown Below
Create an actor and implement the interface by adding it to the class. For this example I have called the recording start at event begin play. The reverse event when ever triggered, will stop the recording and reverse for a specific duration or based on the buffer size. When its called the recording is stopped and resumed once the reversal is over.
The character or actor will trigger the event to call the reversal function for all the actors that implement the interface we created.
Output

Universal Interaction Component
Following component allows a character to interact with other actors. (Currently the inspect actor is implemented)
Usage
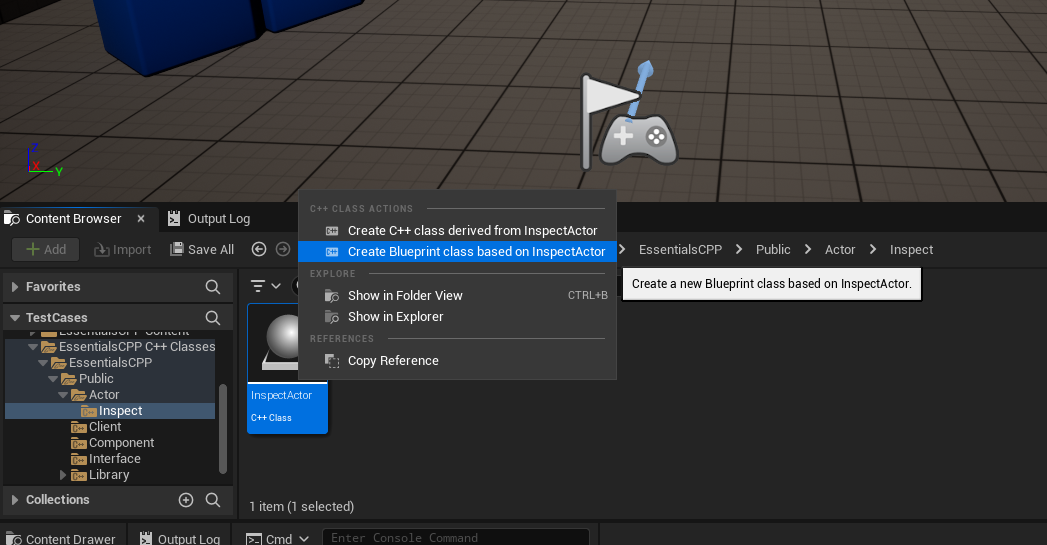
To use the inspect actor, create a blueprint from the inspect actor as shown below.
Then add a static mesh to the inspect actor.
Place the actor in the world.
Now in the character add the universal Interaction component. Once done setup as following:-
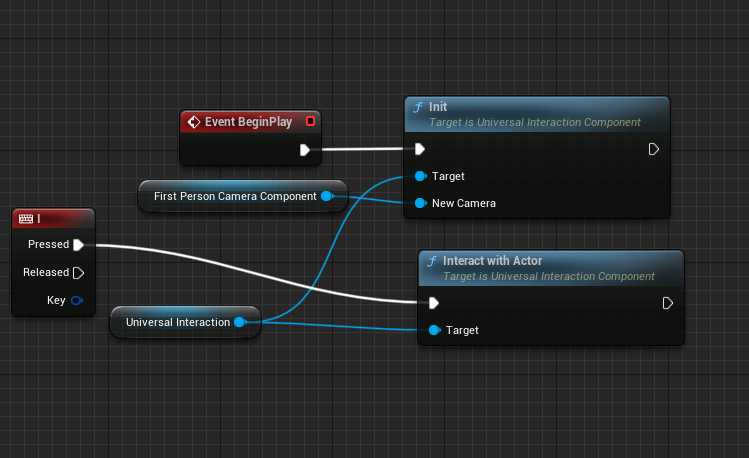
And that’s it. The entire setup is now done.
Output

As shown, the player has to overlap the collision component of the inspected & look at it as well actor in order to inspect it.